
Find your support topic here

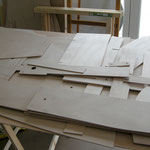
For an effective workflow, first saw out all the plywood parts, sand them to size and label them. Curved wooden parts can be installed very well if they have been soaked and preformed long enough beforehand. When using water-thinnable wood glue, the wood parts can be glued when they are wet. When using epoxy adhesives, the parts must be dry when gluing. Cavities that cannot be accessed later should be sealed. Please check the symmetry again and again with a tape measure and angle.
Enlarge images with a click.


Fotos: Tony Grant

When it comes to aluminum parts, too, it is most effective to first saw out all the parts, file them to size and drill them. The glue joints between aluminum and wood are to be made with epoxy glue. Sand and degrease the aluminum on the adhesive surfaces. In order to obtain the greatest possible power transmission, please glue all surfaces to be brought into contact.
Enlarge images with a click.


Fotos: Tony Grant
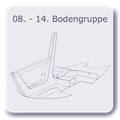
This construction phase forms the basis for a successful body. Glue and screw all upright parts at right angles to the vehicle floor and also at right angles to each other. Pay attention to the marks and lay the vehicle floor flat!
Enlarge images with a click.


Fotos: Tony Grant
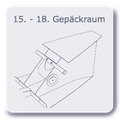
Glue the entire luggage compartment to the vehicle floor, which is still flat.
Enlarge images with a click.

Fotos: Tony Grant
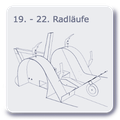
After the inner walls of the wheel arches are glued to the floor pan, the wheel arches can now be bent and glued. To get the exact shape work symmetrically. To do this, lay strips across both wheel arches and clamp them in place. You can also make stencils.
Enlarge images with a click.


Fotos: Tony Grant
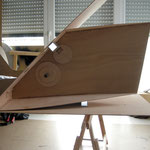
An important build step takes place at this point: the front part of the vehicle floor is screwed to the mounting plate at a distance of 3 mm, while the rear part of the vehicle floor is raised to the specified level.
Enlarge images with a click.

Fotos: Tony Grant

Now the seat can be glued to the luggage compartment and the vehicle floor. After the glue has hardened, the upper part of the seat is bent forward and fixed with a string.
Bilder per Klick vergrößern.


Fotos: Tony Grant
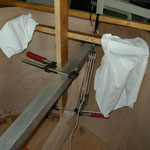
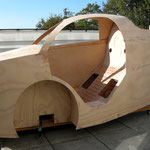
Work symmetrically here too. Place both sides of the body against the outside of the wheel wells and work first towards the front and then towards the rear. Soak the bow area for a long time and use wet towels if necessary. A lot of force is required here and appropriate aids are required. Use the "stich & glue" method. Adjust the pieces and only glue when everything is in place.
Bilder per Klick vergrößern.


Fotos: Tony Grant
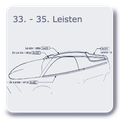
Use strips to connect the parts at the joints. At these points we can shape and stiffen the curves of the body.
Bilder per Klick vergrößern.


Fotos: Tony Grant

Because of the correct shape, the door can only be sawed out when the body is finished. Note the course of the cutout to the internal structures. Keep a small distance of about 1 mm. Use two hinges or a piano hinge for the door according to the assembly diagram shown.
Bilder per Klick vergrößern.

Fotos: Tony Grant
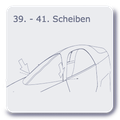
At this point it makes sense to first make stencils out of cardboard. If necessary, you can make adjustments or try out an individual design and then cut out the polycarbonate to fit exactly.
Bilder per Klick vergrößern.


Fotos: Tony Grant

Lay and mount the brake cables as shown, coming from above to the brake. The bottom bracket is mounted below the bottom bracket mast. Adhere to the following 3 points, then the setting of the steering geometry fits: 1. The contact points of the front wheels are each 40 cm from the center of the vehicle - measured on the floor - track width = 80 cm. 2. In all steering and suspension positions, the wheels have an even and sufficient distance from the wheel opening. 3. The wheels must be parallel to each other in the straight ahead position.
Enlarge images with a click.


Fotos: Velomobiel.nl / Tony Grant